

Flooring prep guide
How to prepare surfaces for flooring prior to installation.
Everything you need to know before starting your project.
Timber Floors (Joists & Boards)
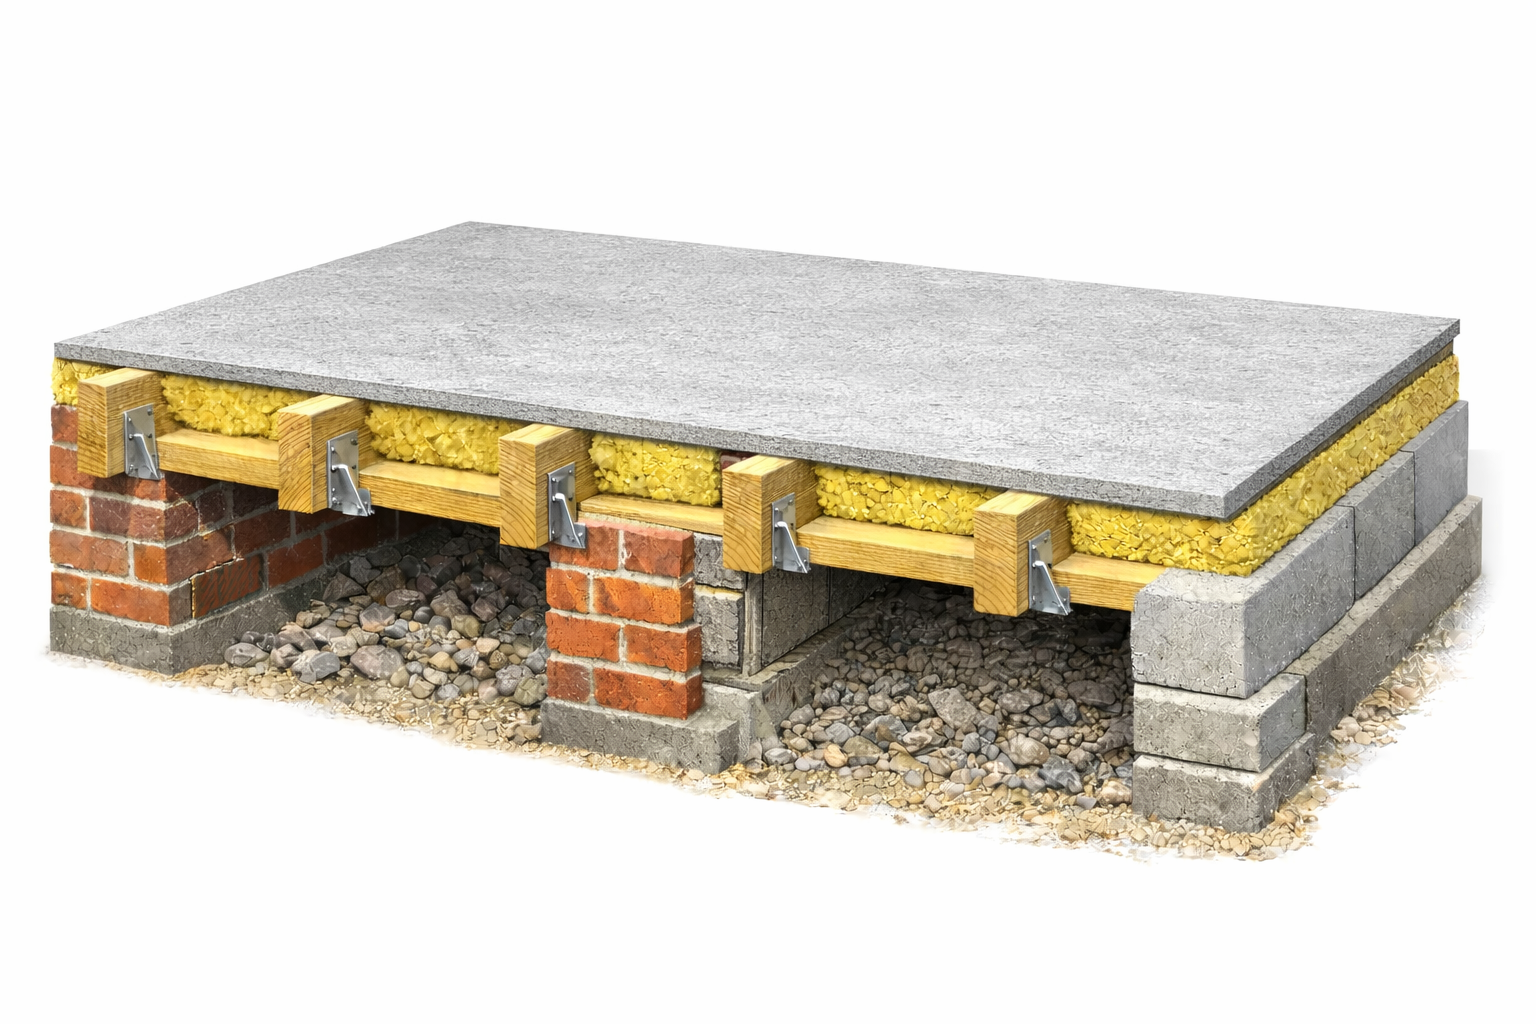
Strengthen the structure by installing additional noggings where required to ensure rigidity.
Install insulation between joists (optional), depending on thermal and acoustic requirements.
Fix rigid boards such as plywood or cement boards to create a stable substrate.
For underfloor heating systems, use grooved cement boards and install pipework accordingly.Secure all boards firmly using appropriate fixings to eliminate any movement or flex.
Overlap with NoMorePly TG4 Construction Board 1200 x 600 x 18mm
Fix using screws + adhesive for joints
Stagger joints with plywood
Ensure tight T&G connections
Newly laid Screeds
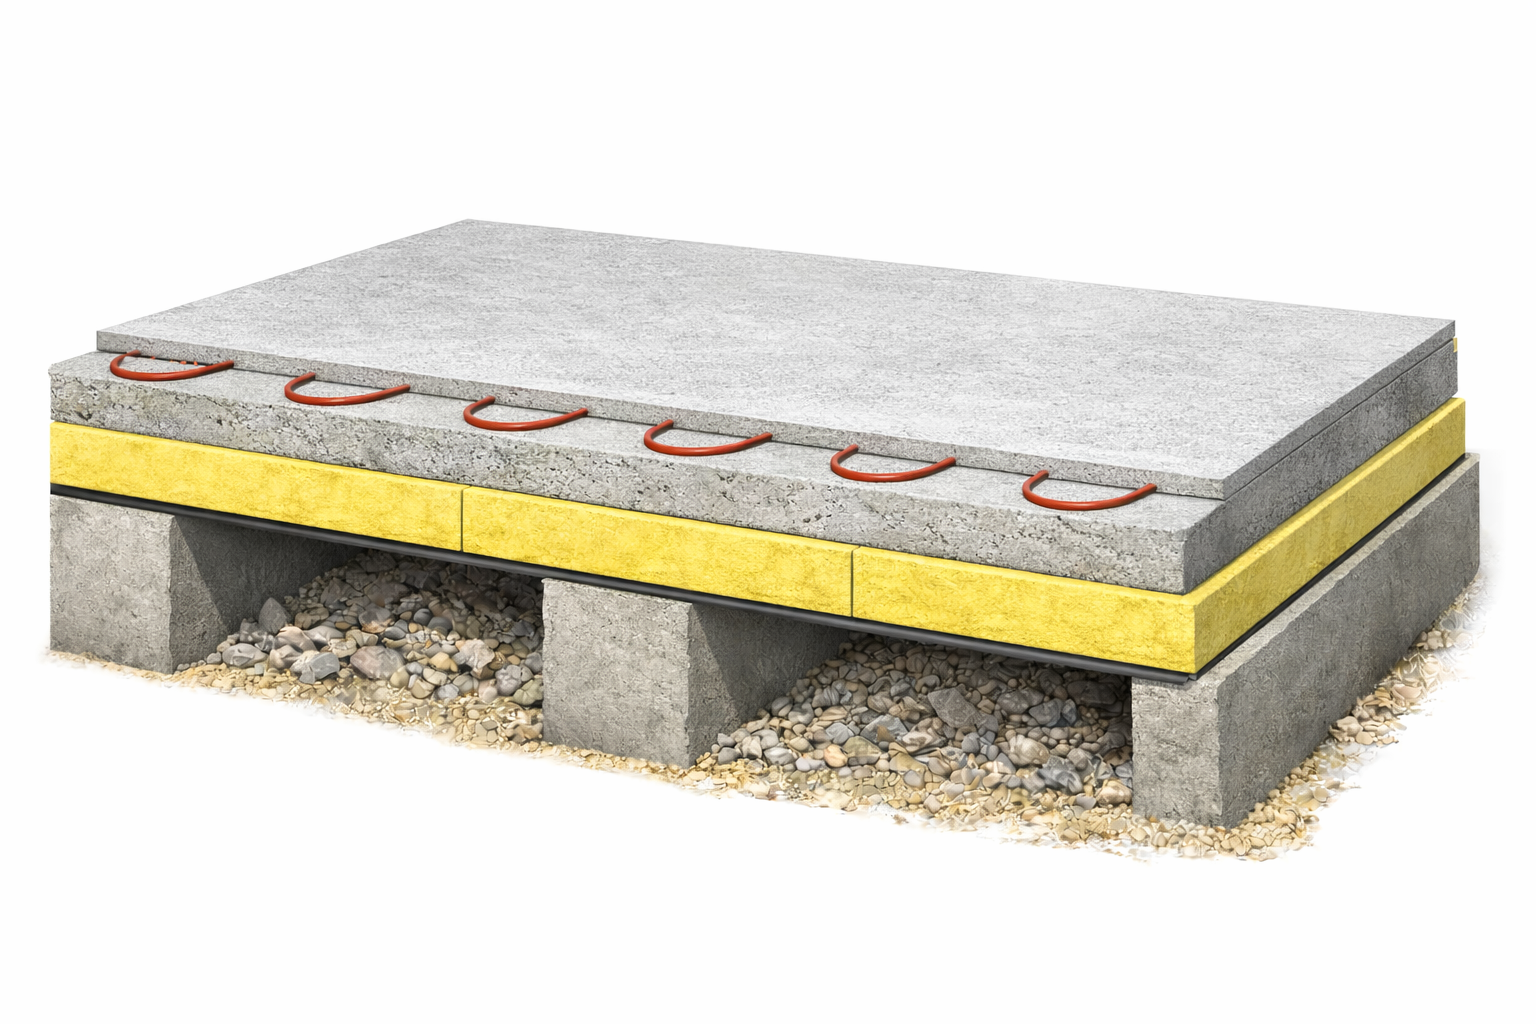
A damp proof membrane (DPM) and perimeter foam expansion strip must be installed by the contractor to allow for movement and moisture protection.
Expansion joints should be incorporated into concrete floors at intervals of approximately 20–25m² or at structural breaks such as doorways.
Always confirm exact requirements with the project architect or contractor.Newly installed floors must be allowed to fully cure, which typically takes 6–8 weeks, depending on site conditions.
Where underfloor heating is installed, it must be commissioned through a full heating cycle, gradually increasing temperature to avoid thermal shock and stress on the substrate.
For the guidelines please follow UFH manufacturers guidelinesAny cracks or movement-related defects that appear during the curing process must be properly repaired before microcement installation begins.
Combination - Concrete/Block & Beam - Timber Floors (Joists & Boards)
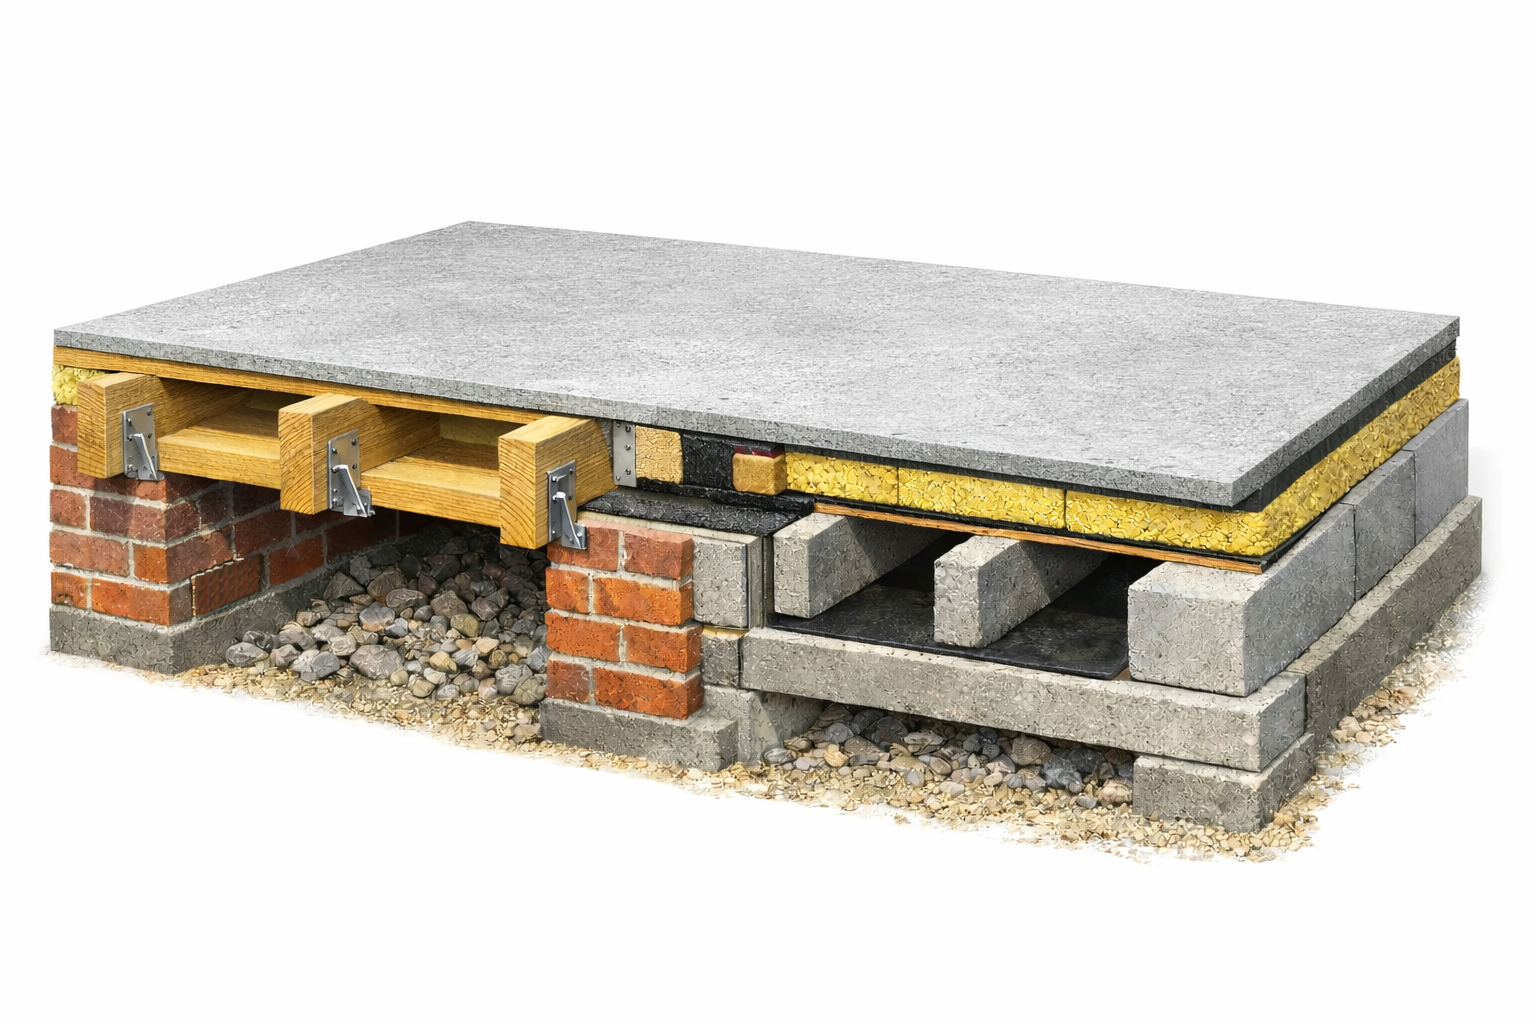
Screed the solid floor to match the finished height of the plywood within the suspended floor system, ensuring a continuous and level surface throughout.
For areas with underfloor heating (UFH), install grooved cement boards across the entire floor to accommodate pipework.
Install the UFH system in accordance with manufacturer guidelines and carry out a full pressure test prior to covering.
Apply a 2-part self-levelling compound to create a smooth, uniform surface ready for microcement application.
Where UFH is not installed, ensure all plywood joints are staggered/overlapped with NoMorePly TG4 Construction Board 1200 x 600 x 18mm
Fix using screws + adhesive for joints
Stagger joints with plywood
Ensure tight T&G connections
Ensure transitions between plywood and screeded areas are properly levelled.
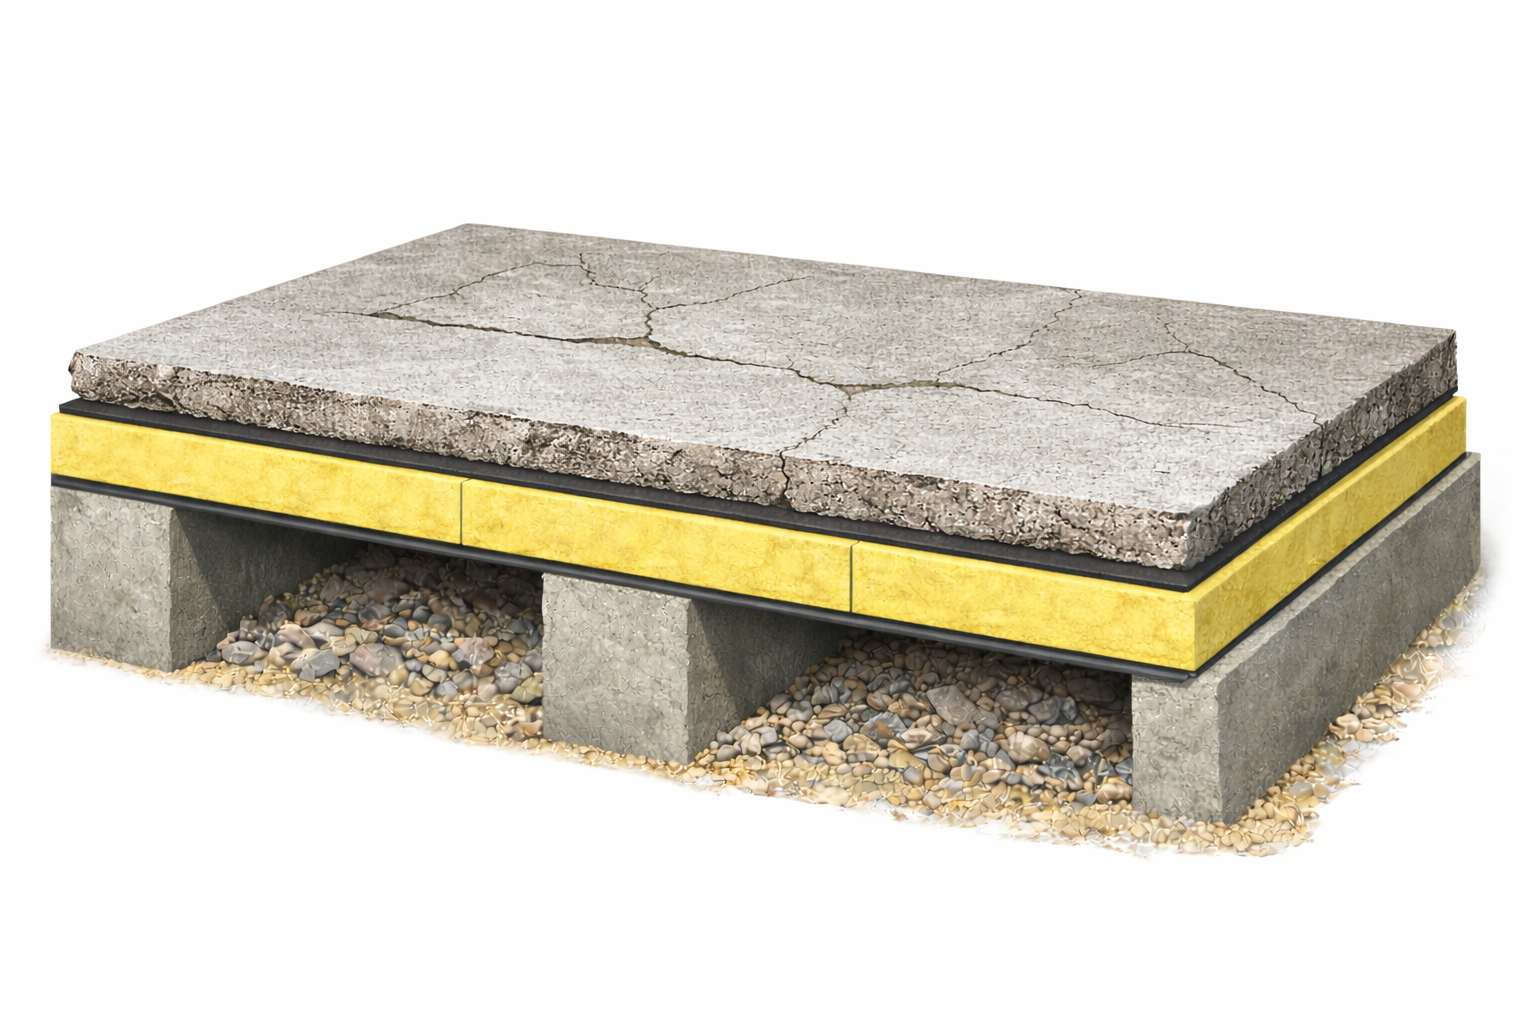
Old Screeds / Concrete
Inspect the Existing Screed
Cracks or movement
Hollow or weak areas
Moisture issues
Level and flatness
Grind the surface to remove:
Laitance (weak top layer)
Old coatings or contaminants
Deep Cleaning
Remove all dust and debrisDegrease if necessary
Ensure surface is completely clean
Crack Repair & Stabilisation
Open cracks using grinder
Clean out dust
Fill with epoxy or repair mortar
For structural cracks → use stitching bars
Levelling the Surface (Optional)
Pour self-levelling compound
Reinforcement Layer
Epoxy Primer