

Bathroom Prep Guide
Everything you need to know before starting your project.
1. Demolition
Remove sanitaryware, sockets, lights etc.
Remove tiles, adhesives, and old coatings
Strip back weak plaster or damaged boards
Lift flooring down to structural base

Key checks:
Substrate must be solid and load-bearing
No loose material or contamination
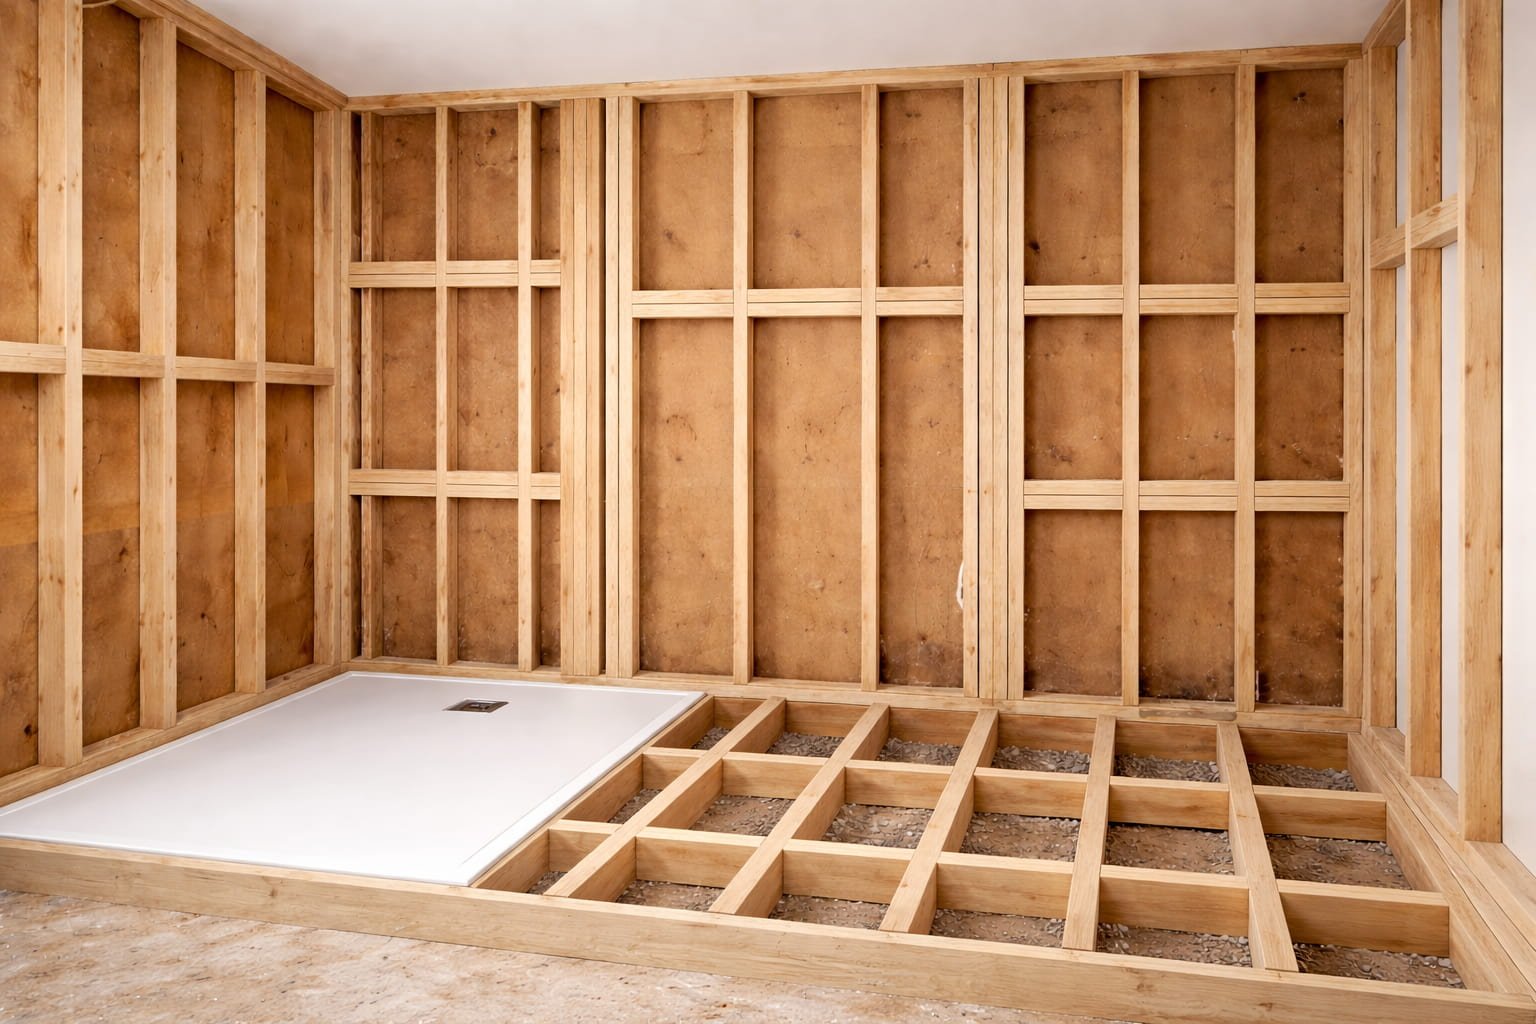
2. Structural Prep (Noggings & Reinforcement)
Install timber noggings between studs
Reinforce areas for:
Shower trays
Basins
Wall-mounted fixtures
Key checks:
Ensure all framing is rigid
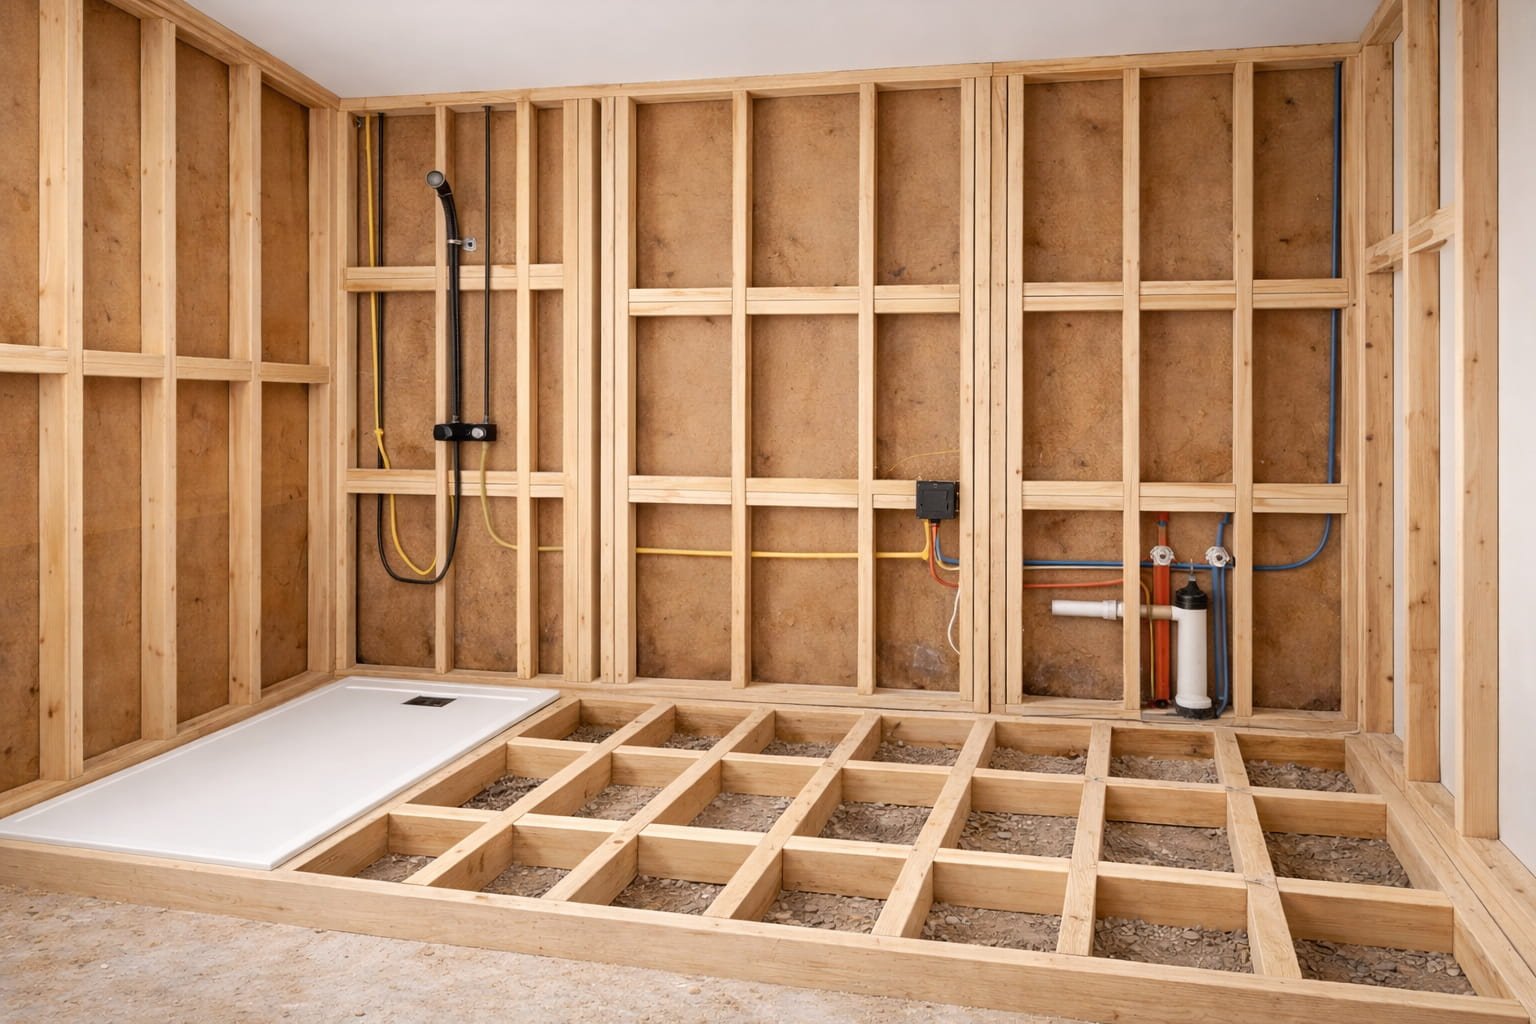
3. First Fix Plumbing & Electrics
Run pipework
Fix shower tray level and secure ( It`s very important to support shower trays edges with additional noggings )
Install waste pipes correctly
Run cables for lighting, fans, sockets
Key checks:
No leaks
Correct falls on waste pipes
Tray is perfectly level
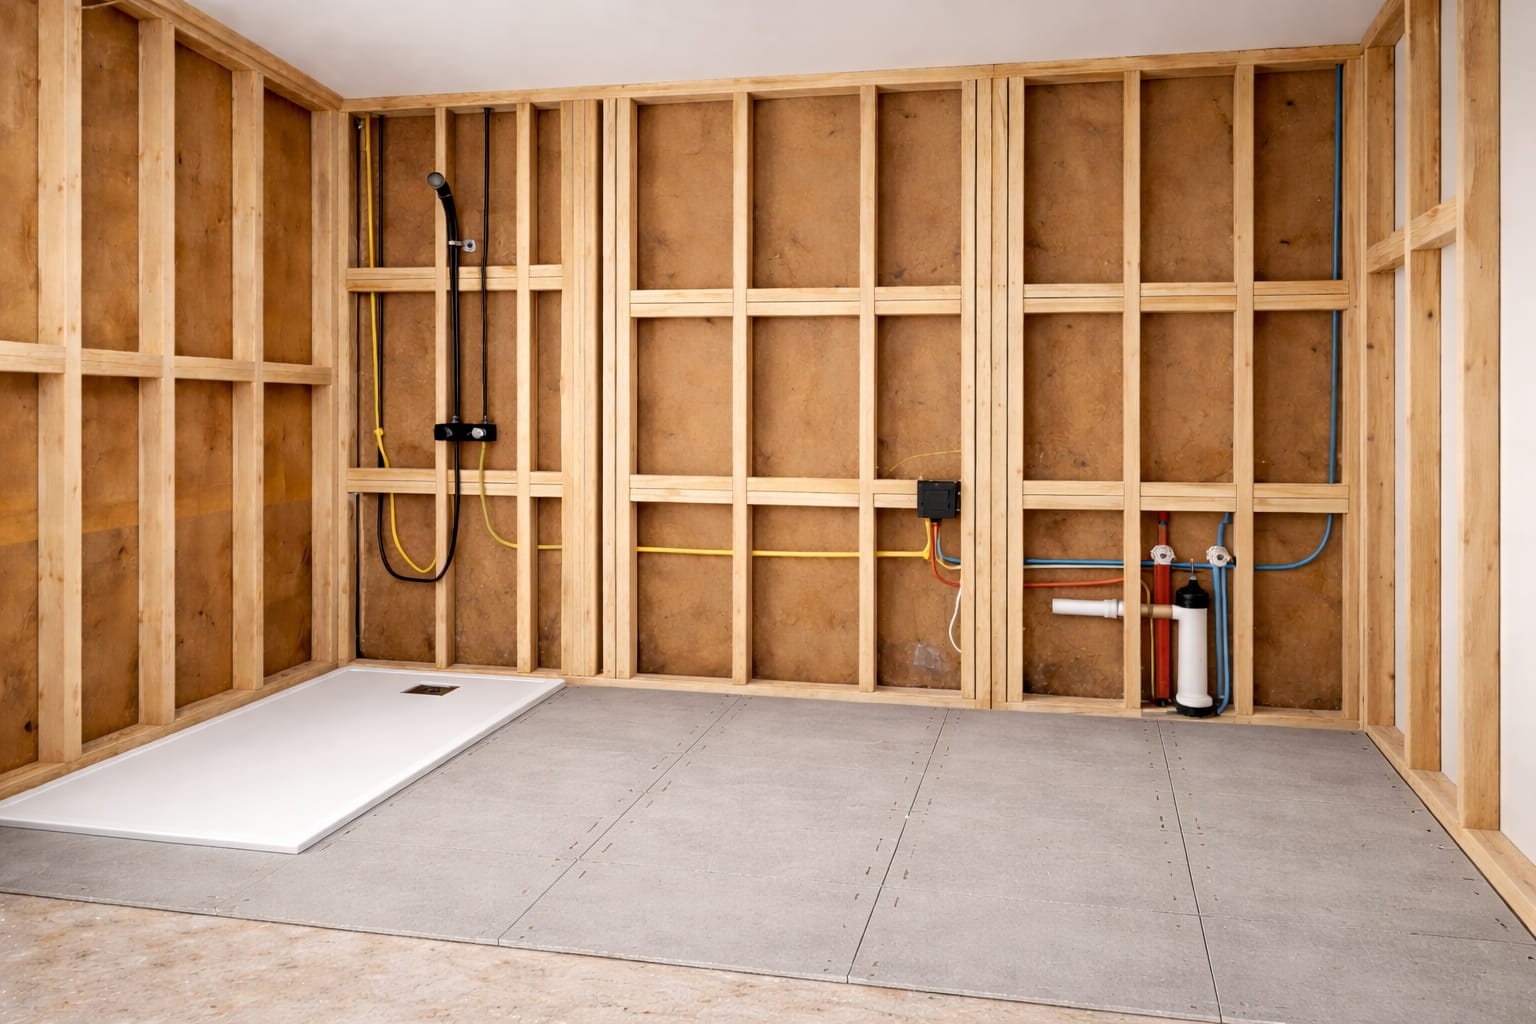
Install 12MM hardwood plywood over the entire floor
Install NoMorePly TG4 Construction Board 1200 x 600 x 18mm
Fix using screws + adhesive for joints
Stagger joints with plywood
Ensure tight T&G connections
Floors should be same level with shower tray - 12mm plywood + 18mm cement board
4. Subfloor Installation
Key checks:
No flex or bounce
Boards fully supported
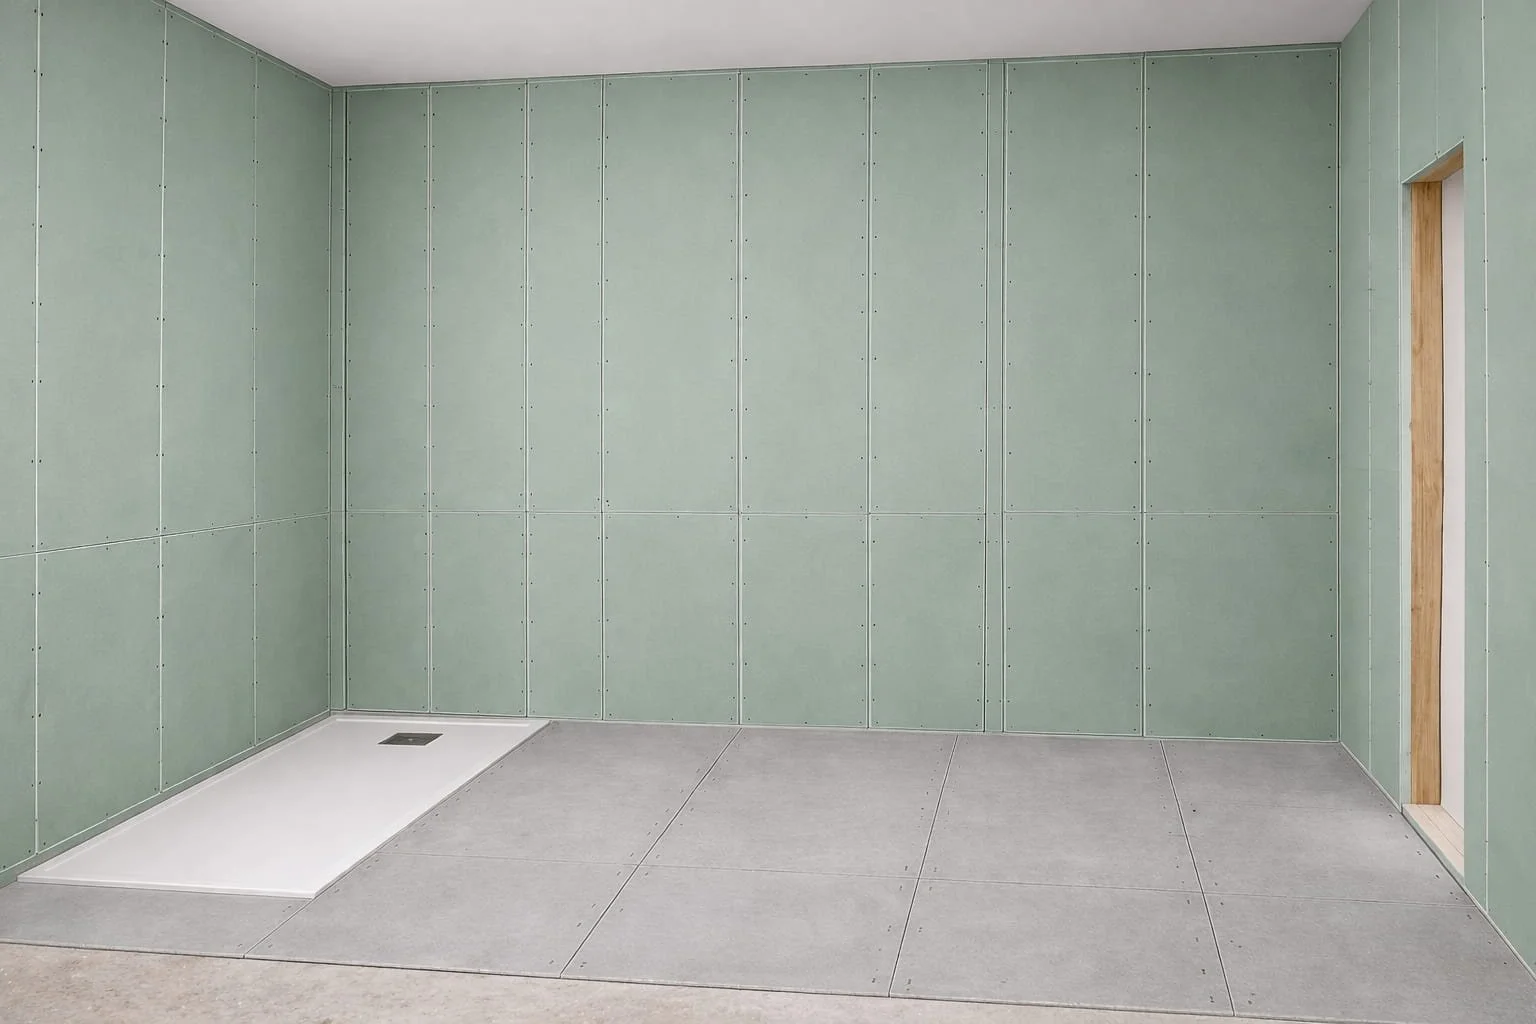
5. Wall Boarding (Moisture Resistant)
Use moisture-resistant plasterboard (green board)
Fix via:
Dot & dab (solid walls)
Screws (stud walls)
Ensure boards are plumb and level
Its important for boards to lay on the floor with stud support underneath to eliminate movement
Key checks:
No gaps or movement
Boards aligned flush
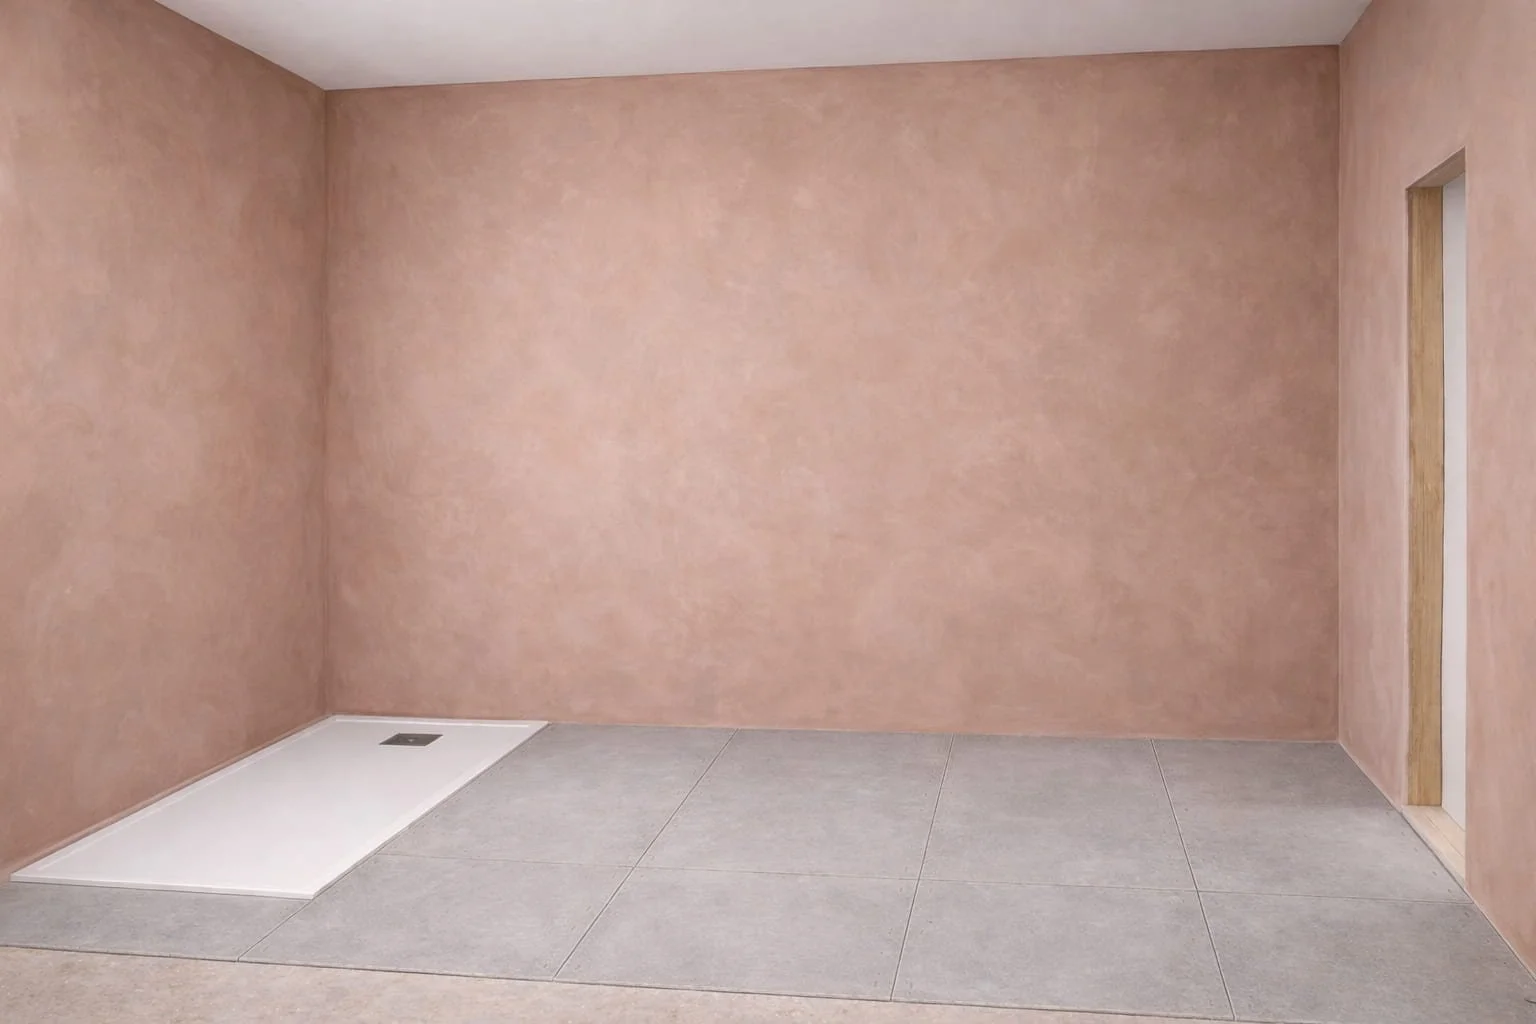
6. Tape & Jointing / Plastering
Apply skim tape on joints / screw holes
Apply coat of compound or plaster
Sand smooth (If tape & joining )
Key checks:
No visible joints
Surface feels completely smooth
“Ready for Paint finish”
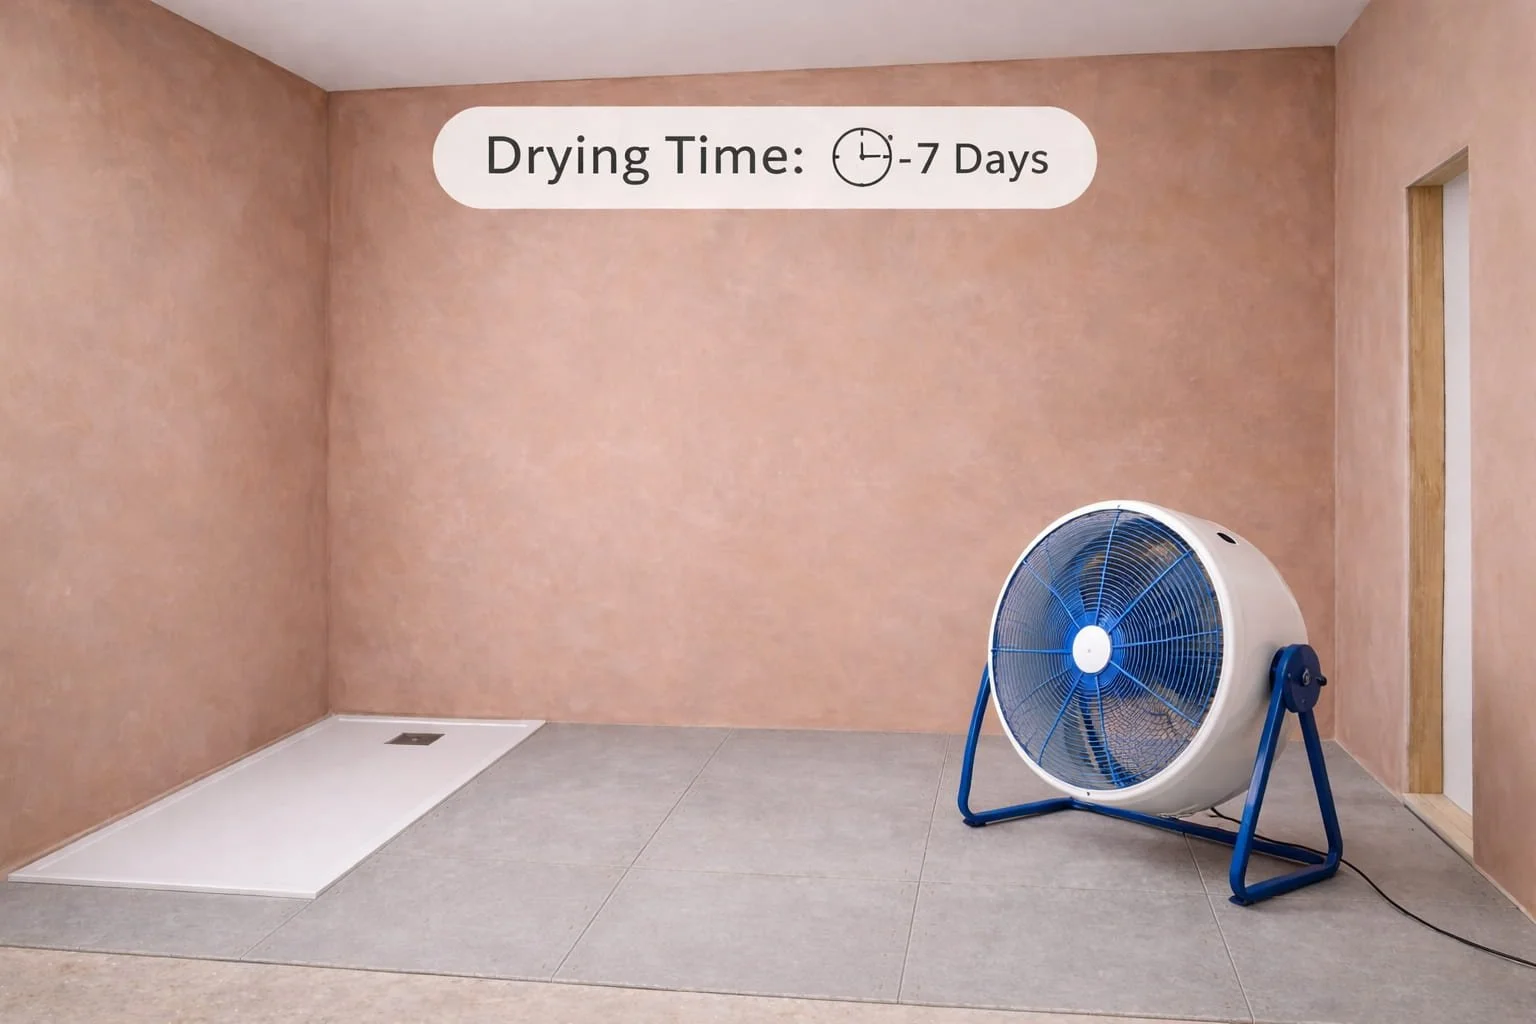
7. Let the surfaces dry
Tape & joint can take few days to a week to dry in regular living conditions
Plaster normally takes 1-2 weeks to fully dry in regular living conditions
Temperature & Ventilation plays a key part in drying process
Key checks:
Keep warm room temperature 18-24 ℃
Run regular ventilator for air circulation
Regularly open windows to get rid of humidity
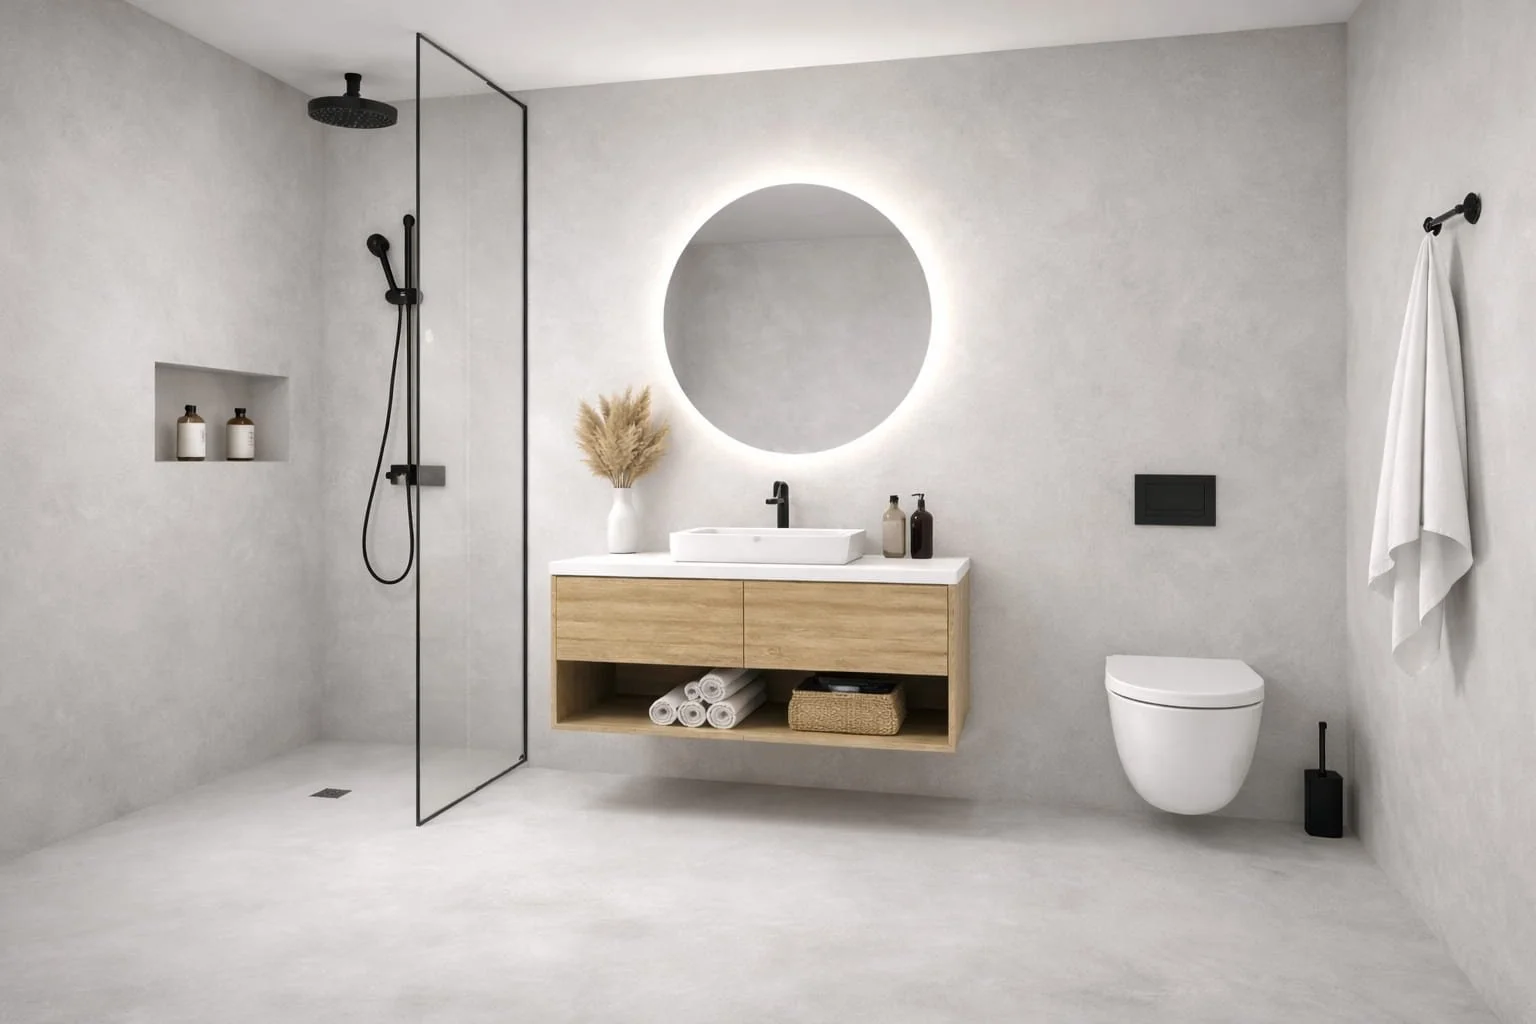
The quality of your microcement finish is entirely dependent on preparation.
A perfect substrate ensures durability, waterproofing, and a premium finish.
Final Takeaway